
| *Notation will be the following… Total number of Missiles — Super Missiles — Power Bombs — Energy Tanks — Reserve tanks. See example (230.50.50.14.4) |
Super Metroid, possibly the best Super Nintendo game ever created and one that is still resonates today and is as playable now as it ever was.
The following is a step by step walkthrough for the normal person, to complete Super Metroid under three hours whilst collecting 100% of the items.
We have avoided any complicated tricks and avoided any wall jumping as it is a pain in the arse…
good luck and enjoy!
CERES SPACE COLONY
- Start Super Metroid. Woo!!
- As you begin, simply follow the only path laid out before you, after several rooms you will come to the Metroid room and Ridley will appear.
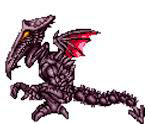
- –BOSS FIGHT– RIDLEY – Get down under 29 health as fast as possible – You can not win.
- Escape CERES SPACE COLONY following the same path out.
PLANET ZEBES
–CRATERIA–
- Once your ship lands head left through the Blue Door and on through the following rooms until you reach a wall.
- Head all the way and down and through the Blue Door in the floor.
- Travel down the long CRATERIA shaft and right through the Blue Door. The easiest way to pass through this room quickly is to fall to down the right side of the room along the wall.
- Through this room and exit the right Blue Door.
- Use the lift to travel down to BRINSTAR.
–BRINSTAR–
- Move left until you come to a place you can jump over. Get the MORPHING BALL.
- Ignore the light beam, crouch down to shoot a weak block and use morph ball to roll out and escape.
- Continue along to the right, past the lift and pass through the Blue Door on the right.
- Shoot the blocks to pass down through the room and go through the Blue Door on the bottom left.
- You will receive your first missile pack in this room. MISSILE #1 (5-0-0-0-0)
- Exit room and travel back to the top of this room. Use your first 5 missiles to open the Pink Door.
- There is another missile pack in this room. Move to the right, roll through and grab MISSILE #2. (10-0-0-0-0)
- Travel back to the lift and transport up to CRATERIA.
–CRATERIA–
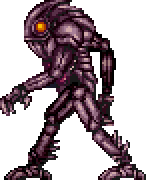
- Enemies will now appear! Move through the door to the left, kill all of the Zesbian Space Pirates in order to open the left door in this room. Go through it. (kill all enemy’s in a room will be referered to as a K.A.R).

- Make your way up to the top of this tall room utilising your high jumps (as opposed to spinning jumps). Exit through the door in the ceiling.
- Make use of the SAVE ROOM (on the left, through a morph ball gap) if you wish on your way back up.
- Move to the right until you find a gap which you can morph ball through.
- Drop down and go through the Blue Door at the bottom.
- Open the Pink Door, refill using enemies and continue on.
- –BOSS FIGHT– TORIZO collect the BOMB and the Chozo statue will come alive.
- Backtrack through the two blue doors and move up through the right passage. Bomb a path out.
- Go back down the left shaft and enter the Pink Door on the right. Pass through this rooms to collect the MAP#CRATERIA. Go back out.
- Enter the opposite Blue Door.
- Roll and bomb through and pass through left Blue Door.
- MISSILE #3 (15-0-0-0-0) in this room. Exit room..
- Lay a bomb to bounce up to pass through a secret passage out.
- Go back to the top of the shaft.
- Go to the very left of this room and bomb the wall. Pass through the left Blue Door.
- Collect first energy tank. ENERGY TANK #1. (15-0-0-1-0).
- Go through the left Blue Door in this room.
- Kill these Zesbian Space Pirates using missiles. Exit left Blue Door.
- Pass through room, left Blue Door.
- Travel down to BRINSTAR using the lift.
–BRINSTAR–
- First left Pink Door.
- Jump up, bomb through wall and go through left Blue Door.
- MAP#BRINSTAR.
- Kill All Room (K.A.R.) to escape back to shaft.
- SAVE ROOM directly below previous room (second left Pink Door).
- Bottom left Pink Door leads to MISSILE RECHARGE STATION.
- Go through opposite Pink Door on bottom right.
- Bomb right wall to pass on through to a Blue Door. Go through.
- THIS ROOM WILL BE REFERRED TO AS ‘THE PINK ROOM’
- Make your way to the bottom of the room and collect MISSILE #4. (20-0-0-1-0).
- Bomb outlined blocks to the right on the floor. Pass through to collect the CHARGE BEAM.
- Go back up and make your way to the top of the ‘PINK ROOM’.
- At the top left of the room bomb a hidden path to discover a SAVE ROOM.
- Continue right. Open the Pink Door, refill missiles with enemies from the pipe to the left. Go through.
- Kill All Room (K.A.R.) leads to a Blue Door in the ceiling. Pass through.
- –BOSS FIGHT– SPORE SPAWN You can sit relatively unharmed on the left upper ledge in morph ball, moving as needed. When SPORE SPAWN opens up jump up and fire missiles (or charge beam) to defeat him.

- Jump up on the now harmless SPORE SPAWN to exit the room using the top right Blue Door.
- Fall down the hidden passage on the far right side of the room (in a pipe).
- Collect super missiles for the first time. SUPER MISSILE #1 (20-5-0-1-0).
- Go through the Blue Door on the left.
- Go through the Green Door on the left. (super missile x1)
- Use a super missile to make a morph ball path. Bomb through into ‘PINK ROOM’.
- Travel back down to the bottom of the room and leave through the right Green Door.
- Follow the path to the bottom right part of the room.
- Pass through a Blue Gate (by shooting).
- Exit the room using the right Blue Door.
- Jump up on to the ledge and run across the bridge. WARNING: blocks will crumble if you do not continuously run.
- Pass through the right Green Door.
- THIS ROOM WILL BE REFERRED TO AS ‘FRED’S ROOM.
- (This creature will be referred to as a Fred otherwise known as rippers.)

- Work your way down to the base of this room. You will need to bomb some blocks along the way.
- The left Green Door leads to an ENERGY RECHARGE STATION.
- Go through the opposite Blue Door.
- Use a running jump to clear the water and continue through the next Blue Door.
- Pass through the following room and continue right through a Blue Door.
- Continue through the next three rooms (MARIDIA) to reach the lift room.
- Travel down to NORFAIR.
–NORFAIR–
- Pass through the Pink Door at the base of the shaft.
- Collect ENERGY TANK #2. (20-5-0-2-0).
- Fall through the crumbling blocks and morph ball down to a Blue Door.
- Jump and shoot blocks to reach chozo statue. Collect HIGH JUMP BOOTS. Exit room.
- K.A.R.! Jump up to discover MISSILE #5. (25-5-0-2-0) Continue through and exit this room.
- Go back up to the NORFAIR/BRINSTAR lift and exit NORFAIR.
–BRINSTAR–
- Go left. Pass through MARIDIA rooms and into a red room.
- Shoot a dissolvable block in the ceiling on the left side of the room. Jump up.
- Bomb block and then shoot block to clear morph ball path.
- Enter Green Door.
- Collect the SPAZER.
- Go back to the BRINSTAR/NORFAIR lift room.
- Use a super missile to make a hole in the bottom corner of the right wall. Roll through.
- Jump up into the monster ‘mouth’ and pass through the Blue Door.
- Shoot the floor and drop through to the bottom.
- Use morph ball bomb on the right floor to make a path through to a ceiling Blue Door. Go through.
- Use a bomb in the ditch near the right wall and travel through to a Blue Door — SAVE ROOM.
- Go back into the previous room and bomb a crack in the floor (roughly middle) and go down.
- Follow the path to a right Blue Door. K.A.R. Dodge projectiles. Use two missiles on ‘mini kraid’.
- Shoot ceiling, jump up and go through Green Door. ENERGY AND MISSILE RECHARGE STATIONS are inside.
- Go back down, use enemies in pipe to replace any missing super missiles (or skip if trying to do a faster run).
- Use a super missile to open the Gadora Door.
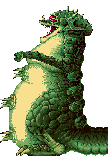
- –BOSS FIGHT– KRAID
- Go through the right Blue Door to collect the VARIA SUIT.
- Exit back out and collect energy and missiles if needed at the recharge stations.
- Pass through the K.A.R through the Blue Door.
- Go back up through the hole in the ceiling and down the left-hand floor Blue Door.
- Roll back out using morph ball and the previously grey locked door is now unlocked. Go through.
- Kill enemies using bombs.
- Shoot ceiling to reveal ENERGY TANK #3.(25-5-0-3-0) Exit room.
- Go back to BRINSTAR/NORFAIR lift room. Go down to NORFAIR.
–NORFAIR–
- Take the first Blue Door on the right.
- Shoot floor, fall down and travel over to the Pink Door on the top right of the room.
- Go into the third hole in this room. Down angle shoot to reveal hidden missile pack in the lava. Roll to collect. MISSILE #6 (30-5-0-3-0).
- Continue through to the Green Door on the right.
- Pass through the room filling with lava and continue through the right Blue Door.
- THIS ROOM WILL BE REFERRED TO AS THE ‘BIG GREEN BUBBLE ROOM’
- Directly above the door you entered will be another Blue Door which leads to a SAVE ROOM.
- Walk across to the right. Shoot the floor to reveal a bomb path.
- Fall down to collect MISSILE #7. (35-5-0-3-0). Go back up.
- Walk a little to the left and bomb between the two gargoyle type heads. Roll through and down.
- Take the Blue Door in the floor.
- The door in the middle of this tall room leads to an ‘enemy refill room’ (a room where enemies continually spawn for easy killing).
- Take the bottom right Blue Door.
- Go through the room with lava and go through the next Blue Door.
- Jump across the hole and continue right through the Blue Door.
- This room will fill with dangerous lava. Go across until you reach an enemy breathing blue fire-balls (Namihe). Morph ball under him. Shoot a path above you and climb the platforms and exit the top left Blue Door.

- Use the traveling platforms to move across the next room. Exit left Blue Door.
- THIS ROOM WILL BE REFERRED TO AS THE ‘JAGGER ROOM’(as these creatures resemble Mick Jagger dancing otherwise known as Alcoon)

- Ignore the pink doors and take the top left Blue Door.
- Move upwards and take the top right Green Door. WARNING: do NOT go left, you will have to loop around again).
- Shoot the enemies on the ceiling and reveal a missing block. Jump up and move through the right Blue Door.
- Run through the next room without stopping. Shoot the ceiling near the door to reveal a hidden missile pack. MISSILE #8. (40-5-0-3-0).
- Enter the Pink Door to collect SPEED BOOSTER. Now open the door and run back out. Continue running to speed boost and escape the lava and pass through the left Blue Door.
- Drop back down and return to Big Green Bubble Room.
- Go back down the morph ball path between the two gargoyle heads. Take the left Blue Door this time.
- Jump over the hole and continue through the left Blue Door.
- Speed Boost through this room to the Blue Door Save if you wish – SAVE ROOM.
- Continue left through the Blue Door.
- Take the top left Green Door and speed boost to the left Blue Door in this room.
- Use traveling platforms and continue through left Blue Door.
- Move up past the fire breathing enemies to the top of the room.
- Bomb/shoot the floor without falling down.
- Drop down as a morph ball to the right hand side. You will land on a protruding block. Continue to fall into the gap underneath and to the right of you.
- Go through the right Blue Door. Collect the ICE BEAM and exit back out.
- Go back around the fire breathing enemies and exit the top right Blue Door.
- Freeze the enemies in the lava at the top of their spring to create platforms to move through the morph ball gap.
- Freeze the enemy over the lava pit to use as another platform and exit the right Blue Door.
- Fall through the collapsible floors. Roll through to the right side of the room and bomb your way out. Exit right Blue Door.
- Travel back up to BRINSTAR using the NORFAIR/BRINSTAR lift.
–BRINSTAR–
- Head back to ‘FRED’S ROOM’ (long red room).
- Move up all of the way to a new Blue Door on the right. Freeze ‘Freds’ to create platforms as you go.
- The next room is filled with enemies who will attempt to devour you. Take the right Blue Door *—Note: It will turn yellow after you pass through.
- Shoot the floor outside the now yellow door to reveal a secret passageway. Move down and go through the Green Door on the left.
- Freeze enemies to make your way across this room. Collect your first power bomb pack from the Chozo statue. POWER BOMB #1. (40-5-5-3-0).
- Lay a power bomb to blast the left wall away. Collect MISSILE #9.(45-5-5-3-0).
- Exit room and go back up to the Yellow Door. Go through using a Power Bomb.
- Backtrack to the BRINSTAR/NORFAIR lift.
- Travel down to NORFAIR.
–NORFAIR–
- Take the Yellow Door on the left. Collect the MAP#NORFAIR.
- Go back into the shaft and take the Blue Door directly above you.
- Speed boost through the room. Power Bomb the floor.
- Move down and around to a Blue Door on the left.
- Fall down this hot looking room. Take the bottom right Blue Door.
- Speed boost through the following room.
- A boss lies through the Green Door in the floor. If you wish, use the SAVE ROOM above and to the right of your current position before passing through.
- –BOSS FIGHT– CROCOMIRE Use Super Missiles/Missiles/Charge Beam to blast his open exposed mouth. He will fall into a pit of acid.

- Walk back to the left until you come to a spiky wall. CROCOMIRE will destroy the wall and die, leaving energy and rewards for collection.
- Jump across the acid and go through a Blue Door to the left.
- Fall down and access a SAVE ROOM to the bottom right, through a Blue Door.
- Go through the Blue Door in the floor.
- Fall down the shaft and enter a Pink Door to the right.
- Move past the acid to collect MISSILE #10. (50-5-5-3-0). Exit the room.
- Continue downwards and through a Blue Door in the floor.
- Drop Power Bombs to clear a running path.
- Move to the right and speed boost left until you are blue and a whirring sound can be heard. At this time press down to activate a speed boost jump. Fall into the Acid and jump. You will hit the ceiling so press right to fall onto the ledge.
- Collect MISSILE #11. (55-5-5-3-0).
- Morph ball through the gap to the right to fall back down.
- Once again get a run up by going to the right. Speed Boost until you reach the edge of the ‘runway’ and jump diagonally left and up.
- Land on a ledge of the top left-hand side of the room. Pass through a Blue Door to the left.
- Collect the GRAPPLE BEAM from the Chozo Statue.
- Use blocks on the left wall to jump up. Use the Grapple Beam to swing across to the Blue Door.
- Use the Grapple Beam to cross the water and continue through the Blue Door.
- Freeze the ‘Namihe’ and make your way to the top right Blue Door by using your Grapple Beam.
- Grapple across the two pits of water.
- Go through a Green Gate and then the Blue Door.
- Then go back through the Blue Door in the ceiling. You can save again now if you wish.
- Move to the top left of the room. Use the Grapple Beam on the flying enemy to cross the gap. Enter the Pink Door to collect POWER BOMB #2. (55-5-10-3-0) and leave room.
- Exit room through top right Blue Door.
- Go to the far right and use the Grapple Beam on the grappling blocks at the right end of the room to reach ENERGY TANK #4. (55-5-10-4-0).
- Exit through the Blue Door in the ceiling.
- Go to the top of this room (saving along the way if you wish) and exit through the top left Blue Door.
- Go to the top of the room, grapple across to the left ledge to collect MISSILE #12. (60-5-10-4-0).
- Pass through the Green Gate then the following Blue Door.
- Go up to the NORFAIR/BRINSTAR lift and up to BRINSTAR.
–BRINSTAR- –
- Travel back to ‘FREDS’ ROOM’.
- Make your way up the first four ‘Freds’ until you see a yellow door on the left.
- Drop a Power Bomb to open the door.
- WARNING: this room has the ‘Fireflea’ who will darken the room as they die.

- Jump and grapple your way to the left side of the room. Enter the Pink Door.
- Bomb the silver column to be raised up and move across to the sitting Chozo Statue. Claim the X-RAY SCOPE.
- Use the X-Ray Scope to escape the room and exit the way you came. Leave this room.
- Return to ‘FRED’S ROOM’
- Drop a Power Bomb to blast the blocks away.
- Continue traveling up ‘FRED’S ROOM’ all of the way to the top. Enter the Blue Door on the right.
- Clear this room and continue right through the Blue Door.
- This time, jump up to the top of the shaft (saving along the way if you wish).
- Go through the Green Door on the left.
- Drop a Power Bomb at the left side of the room. Drop down through the first ‘toothy monster’ enemy and grab POWER BOMB #3. (60-5-15-4-0).
- Exit noting this is a K.A.R.!
- Go up to CRATERIA using the BRINSTAR/CRATERIA lift.
–CRATERIA–
- Pass through the Yellow Door in the ceiling.
- Jump up the platforms and shoot the ‘ceiling’ to continue up and out.
- Go through the Yellow Door on the right.
- Use the Grapple Beam to cross the water and collect MISSILE #13. (65-5-15-4-0).
- Continue across and move through the Blue Door on the right.
- Down into the water, to the bottom left wall (along the ground) shoot the wall to expose the morph pathway.
- *—Note: you cannot propel yourself with morph ball bomb in the water. Instead jump and transform into morph ball in the air to enter the gap. Grab MISSILE #14. (70-5-15-4-0).
- Go back out of the water the way you came.
- Use the grappling beam to move right across the platforms. You will need to use the grappling beam on the Green Fred at one point to cross the water.
- Enter the Green Door.
–WRECKED SHIP–
- Run along the conveyor belt and go through the right Blue Door.
- Go down three stair cases, bomb the left wall and roll through. You will find MISSILE #15. (75-5-15-4-0).
- Exit this room and continue moving down the main shaft. Use will need to bomb the floor at one point to continue moving down.
- Enter the Green Door in the floor.
- Go to the right side of the room and bomb the floor to reveal a gap.
- Roll through and use a Super Missile to enter the ‘Gadora Door’.
- –BOSS FIGHT– PHANTOON

- Exit the boss room, roll through the morph ball gap and go through the Blue Door on the left side of the room. MAP#WRECKED SHIP. *—Note power is back on!
- Go back out and up the Blue Door in the ceiling.
- Go up and through the flashing Blue Door on the left. SUPER MISSILE #2. (75-10-15-4-0). Exit room.
- Directly across the door you just left bomb the wall. Roll through to find a Blue Door. Go through.
- Make your way to the right side of the room. Knock the robot off of the ledge by shooting at him. Morph ball bomb or drop a Power Bomb to clear a path through the wall (second hole up). Collect SUPER MISSILE #3. (75-15-15-4-0) Exit room.
- Continue moving up the shaft and take the Blue Door opposite the entrance to the right to save. SAVE ROOM.
- Keep moving up the shaft. You will need to shoot your way through some blocks. Continue until you reach a Blue Door in the ceiling and enter.
- This is a K.A.R. Kill the enemies and take the Blue Door on the right.
- *—Note: if you kill everyone and shoot all doors open before leaving you will not have to kill them all again a second time.
- Shoot the robots into the holes (out of the way). Grab MISSILE #16. (80-15-15-4-0) and exit back out of room.
- Progress through the left Blue Door.
–CRATERIA–
- Jump across the platforms until you see a platform creature you can jump on (green with blue flame trail *Tripper). Jump on to this creature. You will need to jump up on to two more of these creatures to reach the top of the map.

- As your ‘creature’ nears the left wall/rocky ceiling shoot continuously. You will reveal MISSILE #17 (85-15-15-4-0).
- Drop back down and go to the left. Use the X-Ray Scope to reveal a Super Missile block in the ground. WARNING: 2 Super missiles are required! Shoot it and morph ball down the path. Collect MISSILE #18. (90-15-15-4-0). WARNING: Do not continue to roll down and right, instead use the X-Ray Scope to return the way you came.
- Walk right to another ditch in the ground. Use the X-Ray Scope to reveal another path. Bomb or shoot and roll through.
- Continue through a Blue Door on the right.
- Make your way through this room and continue through another Blue Door onto the sky bridge. Continue through another Blue Door.
–WRECKED SHIP- –
- Grapple Beam over the spike to reach a Chozo Statue. Morph into a ball in his hands. He will come to life and carry you into a room below.
- Drop a morph ball bomb in front of the Chozo Statue’s feet and roll through. Shoot upwards to clear a path.
- Move across to the right side of the room shooting the robot out of the way. Collect MISSILE #19 (95-15-15-4-0)from the Chozo Statue. (95-15-15-4-0).
- Drop a Power Bomb to clear the statue and wall.
- Use Speed Boost to get a run up and activate speed jump near the right wall. Jump up the tall shute. You will see an item ‘egg’ down below. WARNING: there are collapsible blocks next to this item, be careful to jump over.
- Collect your first Reserve Tank. RESERVE TANK #1. (95-15-15-4-1).
- Make your way back to the Chozo Statue that brought you down from upstairs. Go through the Blue Door on the left.
- Collect the GRAVITY SUIT. Go through the left Blue Door. *—Note: hold right as you exit the door to fall onto the platform below.
- Re-enter the WRECKED SHIP.
- Take this opportunity to save if you wish. Then move down to the Blue Door directly under the SAVE ROOM.
- You can now jump and move through water with ease! Clear this room and continue through the right Blue Door.
- Pass through the next room, careful of the moving spikes as they cause a decent amount of damage. Go through the next Blue Door.
- Move up through the next room. Ignore the Blue Door to the right. Continue up shooting through ceilings until you reach a Pink Door to the left. Go in.
- Use the platforms and your Grappling Beam to make your way across to a ledge on the left. Pick up ENERGY TANK #5. (95-15-15-5-1). Exit the room.
- Move down and take the Blue Door on the right this time.
–CRATERIA–
- Make your way through this room and through the Blue Door at the far right end.
- Go down until you reach a Blue Door in the ground. Fall down through the room.
- This next room is a maze of tunnels. Go the bottom of the screen. morph ball and roll through as far left as you can. jump up and continue left. at the left side of the room there is a place to bomb down through a large block, (use your x-ray) and bomb again to fall out the bottom.
- Take the Blue Door on the bottom left.
- Go through the Yellow Door in the ground.
- Use the CRATERIA/MARIDIA lift to travel down.
–MARIDIA–
- The Pink Door to the right is a SAVE ROOM. Exit room.
- Next take the Blue Door at the bottom left of the room. Continue left.
- Make your way through this room and continue through the left Blue Door.
- WARNING: The pit in this room contains quick-sand and will suck you down if you stand in it too long there are also claw like creatures (‘Yapping Maw’) trying to drag you down. Take the Blue Door

- In this room drop down into the water go left and then jump up on the left-hand side. You will see a Green Door in the ground, leading to the bottom of MARIDIA. Go down.
- Morph ball bomb the floor and take the Blue Door on the left.
- Move through this passage and continue left through another Blue Door.
- This room has a broken pipe in it. Transform into a morph ball and drop down through a hole in the centre of the floor.
- Enter the Pink Door on the right to collect the map. MAP #MARIDIA.
- Now go back into the previous room and move through the Blue Door on the left.
- Continue moving left in this room, pass the Green Gate and proceed to jump down the second last hole. Take the Blue Door on the left.
- You will be in a glass tunnel surrounded with water. Lay a Power Bomb and watch the tube shatter around you!
- Fall down and use the save room if you wish. SAVE ROOM.
- Jump up to the top of the room. Go through the Blue Door in the ceiling.
- Take the first Pink Door on the right.
- This part is tricky. You will need to shoot the door open behind you, open the Green Gate and kill the enemies in the room. Move to the right side of the room to get a run up. Speed Boost through the room, crouching down to activate Speed Jump just before going through the door. You will need to jump up as you reach the largest plant on the ground. You will shoot up to hit a high ceiling and get MISSILE #20 (100-15-15-5-1).
- Continue making your way to the top of this room, take the Blue Door going right.
- Move down to the bottom of the ledge, morph ball and roll off the side pressing left. You will fall into a secret passageway back into the previous room. Collect Super Missile #4. (100-20-15-5-1).
- Now use the Grappling Beam to make your way to the top right corner of this room. Exit through the Blue Door. *—Note if you fall use the balloon like creature(‘Powamp’) to make your way up.

- In the next room take the Blue Door in the ceiling up the right passage.
- Run to the right through an invisible passageway to claim MISSILE #21. (105-20-15-5-1).
- Now go through the Blue Door on the left side of the room.
- Continue making your way to the left. Walk through some walls and jump up to exit through a left Blue Door.
- Go to the left side of the room and fall down through the floor. Pick up MISSILE #22 (115-20-15-5-1) and SUPER MISSILE #5 (115-25-15-5-1). Exit the way you came to the big open room. .
- Go back down the Blue Door in the floor.
- Shoot the floor in this room and go right through the Green Door.
- Drop a Power Bomb and fall down. The Pink Door to your left leads to a SAVE ROOM.
- Speed Boost to the last gap on the right (above you) and activate speed jump up all of the way to the top of the room. Collect MISSILE #23. (115-25-15-5-1).
- Continue right. BEWARE of falling blocks before the Super Missile pickup. SUPER MISSILE #6. (115-30-15-5-1). Fall through the blocks.
- Now either use the Grappling Beam or Speed Boost to reach the Blue Door in the ceiling (top left corner).
- Use your X-Ray Scope to find a path through the next room. You will need to use the Speed Boost along the floor to clear this room and continue on to the right through the Blue Door.
- –BOSS FIGHT– BOTWOON Power Missiles work wonders on this boss.
- Exit BOTWOON’S chamber through the right Blue Door.
- Use the Speed Booster through this entire room.
- Backtrack and Jump up onto the right side of the purple bricks. Use Morph Ball and X-Ray Scope to make your way through to the left. There is a gap, careful! Collect ENERGY TANK #6. (115-30-15-6-1).
- Go through the Blue Door on the right. Use the Grappling Beam to get to the top of the room and out the Blue Door. (grapple beam works great on Metroids)
- Use the Grappling Beam to cross this room. The Pink Door on the top right of the room is a SAVE ROOM. Next to it is an ENERGY RECHARGE STATION.
- Take the door directly below the save room.
- The spikes in this room are not moving and harmless. shoot the right hand wall to expose MISSILE #24 . (120-30-15-6-1).
- Now go back towards the door you entered. Fall down the hidden hole in the floor. Go through the Gadora Door.
- –BOSS FIGHT–DRAYGON To quickly and easily defeat this boss purposely get picked up. As DRAYGON carries you towards the ceiling use your Grapple Beam to make contact with the broken electrics. This will defeat DRAYGON in seconds!

- Go to the left Blue Door to collect the SPACE JUMP.
- Exit DRAYGON’S room using the newly acquired Space Jump and continue back up to the Save Room (if you wish).
- Back track through the spiky Metroid room to the top Blue Door you originally entered through.
- Enter the now flashing Blue Door in the middle left side of this long room.
- Make your way through to the left side of the room. Access the Blue Door using Space Jump and head on through.
- Move down through the room to the bottom left Blue Door.
- Continue through the sand-pit room.
- You will be back in the large room half filled with water. The previously grey door will now be open in the middle of the room to the right it is only reachable using Space Jump. Go through the flashing Blue Door.
- Use Space Jump to climb to the top of this room. Go though the Blue Door.
- Kill the strange lumpy enemies and continue through the next Blue Door.
- For the moment ignore the enemies in this room. At the bottom of this room collect the PLASMA BEAM.
- This is a K.A.R. You can now kill all enemies using your new weapon.
- Backtrack to the big room half filled with water and to the tunnel that divides MARIDIA. Go through the now (previously Green) Blue Door.
- Make your way to the second last room to the right. There will be a single grappling block in the ceiling. Use the Grappling Beam to make the block disintegrate. Use a regular high (not spinning jump) to jump through the gap.
- Continue up the shaft using Space Jump.
- Move to the right and go down until you reach a Blue Door on the right. Go through.
- Do not kill the enemy in this room. Drop a Power Bomb to destroy the wall and ‘Shaktool’ will crush through the sand wall making a path for you. Go through the Blue Door past this.

- Use morph ball to navigate your way through the passageway and claim the SPRING BALL.
- Exit this room and the previous ‘Shaktool’ room and move down through the ledges.
- Now head back to the big glass tube that you shattered with a Power Bomb (the ‘beginning’ of MARIDIA).
- Make use of the SAVE ROOM if you wish.
- Back up the Blue Door in the ceiling of this passage.
- Now take the second door on the right.
- Move up and over the first hump, drop to the floor and walk through the wall to the right. Open and pass through the Pink Door.
- Either shoot the turtle like creature ‘Yatori’ and catch a ride or use Space Jump to reach ENERGY TANK #7 (120-30-15-7-1) suspended on a grappling block near the ceiling. While in here also grab MISSILE #25 (125-30-15-7-1) hidden in the middle of the right hand wall. This can be done by riding ‘Tatori’ and shooting the wall, then jumping off to claim the Missile Pack.
 otherwise the missiles can be grabbed by a well timed space jump when running in the room.
 - Exit room and move through the ceiling door at the top left.
- Use Space Jump or the Grappling Hook to go through the top right Blue Door.
- Shoot the blocks in the floor in order to go through the Blue Door
- Drop a Power Bomb and go down to the bottom of the room. Run to the right bottom corner, shoot down and drop below.
- There are two sandpits. You will need to move through both in the end so I recommend being sucked down into the left one first (in case you accidentally get sucked down into the right one).
- Pass through the sand filled room and fall into another room.
- In this room is MISSILE #26 (130-30-15-7-1) and RESERVE TANK #2 (130-30-15-7-2). You will need to use Spring Ball (and can use the X Ray Scope to assist you).
- Get sucked into the sand to move downwards into the room below.
- Backtrack to the left to begin making your way around to the room with two sandpits again.
- This time get sucked into the sand-pit on the right and pass to the room below.
- This room holds POWER BOMB #4 (130-30-20-7-2) and MISSILE #27 (135-30-20-7-2). Up left for the Missile Pack and up right for the Power Bomb Pack. Watch out for the falling boulders and use X-Ray Scope to avoid collapsing blocks.
- Travel back towards the start of MARIDIA (shattered glass tube room) except when you fall down into the passage next door move to the right instead to go to the BRINSTAR/NORFAIR lift.
–BRINSTAR–
- Shoot out the Super Missile blocks in the right wall and go towards where you fought Kraid.
- In the room with the winged enemies drop a Power Bomb against the right wall. Use Spring Ball to jump up and collect MISSILE #28 (140-30-20-7-2).
- Go back to the BRINSTAR/NORFAIR lift this time taking it down.
–NORFAIR–
- Take the first door on the left.
- Speed Boost through, then Power Bomb the floor. Drop down.
- Through the Blue Door to the left.
- WARNING: do not fall off the ledge inside the door. You will need to shoot to the left to expose a hidden Missile Pack. Use Space Jump to jump over and grab it. The block will reform very quickly so you will need to move fast. MISSILE #29 (145-30-20-7-2).
- Now take the Blue Door at the bottom right of the room.
- Speed Boost through this room and take the door to the right.
- Make your through the lava room, take the Blue Door.
- Through the ENERGY RECHARGE STATION room and across the room filled with lava and grappling blocks.
- Through the Blue Door and following Blue Gate, morph ball to roll through.
- Go through the Yellow Door at the bottom of this room.
- Go through the lava and use your Space Jump to escape to the top left of the room. Pass through the mouth and subsequent Blue Door.
- Cross the lift room to the opposite Blue Door to access the SAVE ROOM.
- Now travel down to LOWER NORFAIR.
- Travel left over the acid and through the Blue Door.
- Jump over the acid to the left. Lay a Power Bomb to reveal a Gold Chozo Statue. Transform into a morph ball in his hand to activate the lowering of the acid.
- Fall down the hole in the floor and use morph ball bombs to continue moving to the right. Go through the Blue Door.
- WARNING: the floor will collapse under your feet. Use Space Jump to reach MISSILE #30 (150-30-20-7-2).
- Fall down the floor.
- –BOSS FIGHT– GOLDEN CHOZO STATUE. Use Power missiles and charge beam, he will dodge normal missiles.

- Go through the right Blue Door, collect SCREW ATTACK.
- Go back into the previous boss room. Screw Attack up to where the boss dropped down to collect SUPER MISSILE #7 (115-35-15-5-1). Screw Attack will destroy these blocks.
- Head on back through to the right and up this room. The door half way up is an ENERGY RECHARGE STATION.
- Continue to the top right Blue Door.
- Screw Attack through the red flying enemies, through the Green Gate and Blue Door.
- Go through the Blue Door to the right. Screw Attack quickly through the pillars as this room fills with lava! To the Blue Door.
- Climb the next room using Screw Attack. WARNING: Do not go through the Blue Door at the top of the room yet! Instead shoot out the ceiling and take the door in this hidden pocket.
- Morph bomb the centre of the floor. Fall down.
- Bomb the left side of the next level, roll down and through a hole to the left.
- Collect MISSILE #31 (155-35-20-7-2).
- WARNING: As you leave the way you came be careful not to move more than ONE square to the right. If you fall down you will need to loop around costing unnecessary time. Instead use Spring Ball to escape back the way you came and out of the room.
- Go down and shoot the floor and now take the Blue Door to the right.
- WARNING: this room will quickly fill with deadly acid! Make your way to the top right Blue Door to escape.
- Bomb the floor in this room to reveal a hidden passage, go down.
- Use SAVE ROOM half way down if you wish.
- Use morph ball bombs to exit bottom right.
- Drop a Power Bomb and go through the Yellow Door in the floor.
- There is a morph path to the right. Use Spring Ball to jump over the flames and move into the hole. Bomb through.
- Kill the enemies and go to the left side of the room. Use the X-Ray Scope to find the place to morph bomb and go through further to the left. Collect POWER BOMB #5 (155-35-25-7-2).
- Roll back through the way you came and lay a Power Bomb near the three statues.
- Continue down through the spikes and through the Green Door.
- K.A.R. You must defeat the two grey Zesbian Space Pirates to escape this room. They are only vulnerable to attack when they turn yellow after their jumping kick attacks.
- Continue through the left Blue Door.
- Move through the next room and continue heading left through another Blue Door.
- Space Jump across this room, open the Gadora Door and enter into Ridley’s Lair.
- –BOSS FIGHT– RIDLEY.
- Go through the Blue Door to the left and shoot bottom right wall to collect ENERGY TANK #8 (155-35-25-8-2).
- Exit this room and backtrack to the save room. Save if you wish and jump back up.
- Take the Blue Door on the right.
- Use a Power Bomb to destroy the blue fire breathing enemy (Namihe) on the wall and walk through where he was. Head on down to collect ENERGY TANK #9. (155-35-25-9-2). WARNING: This room contains ‘Firefleas’ that will darken the room as they die. Jump back up to where you walked through the wall.
- Make your way to the top of the room. Careful of the rolling boulders.
- At the top of the room ignore the door to the right and instead walk through the trick wall to the left. Go through the Blue Door.
- Go to the top right part of the room to pick up MISSILE #32 (160-35-25-9-2).
- Lay a Super Bomb. Use the Spring Ball to jump through the top gap. Use the X-Ray Scope to find your way through. Go through the Blue Door in the floor.
- Shoot the blocks to reach POWER BOMB #6 (160-35-30-9-2).
- Jump on the left pillar and through the Blue Door to the left.
- Retrace the path you just took moments ago but go through the Blue Door at the top left of the room this time.
- Make your way through this room which has acid rising and falling. When you reach the left side of the room you will change from morph ball to jump up onto a ledge. Drop a morph ball bomb to find the path to MISSILE #33 (165-35-30-9-2). Use X-Ray Scope if you cannot locate it.
- Go back out and continue moving up through the room. Shoot the ceiling to reach a Blue Door above you to the left. Go through.
- Move through this room (using Screw Attack) until you reach a morph ball path. Roll through into the JAGGER ROOM.
- Take the Pink Door just below you to the right.
- Jump across the platforms that are rising and falling. Shoot the Blue Gate and jump through to receive MISSILE #34 (170-35-30-9-2).
- Grapple or Screw Attack across to the Pink Door on the right. Go through to receive the WAVE BEAM.
- Exit and make your back through this room into the JAGGER ROOM. Take the top right door which will lead you into the BIG GREEN BUBBLE ROOM.
- Grapple or Screw Attack across to the Green Door at the top left.
- Go in to collect MISSILE #35 (175-35-30-9-2).
- Jump up and shoot a hole into the left wall. Shoot into the lava to raise a column that will carry you to the morph hole. Roll through. Go through a Blue Door.
- Cross this room to collect RESERVE TANK #3 (175-35-30-9-3).
- Now shoot diagonally down to the right to expose a missile pack hidden in a block. MISSILE #36 (180-35-30-9-3).
- Back to the BIG GREEN BUBBLE ROOM.
- Bomb and roll down the path between the two gargoyle heads.
- Take the Blue Door to the left.
- Jump over the hole and continue through the left Blue Door.
- Speed Boost through this room.
- Move through the Save Room and to the NORFAIR/BRINSTAR lift. Go up.
–BRINSTAR–
- Make your way to FRED’S ROOM.
- Go through the third door on the left.
- Run across the crumbling bridge and through the Blue Door.
- Make your way back through this room. You can now open the Blue Gate from this side as you have the wave beam.
- There is a pipe that has no enemies coming from it. If you jump around you can see it continuing through the wall. It is the second top pipe to the right. Use Screw Attack to jump up into the pipe. Morph ball through to collect MISSILE #37 (185-35-30-9-3).
- Exit the pipe and now go through the Yellow Door at the top right of the room.
- Make your way through this room bombing the wall along the way. Collect POWER BOMB #7 (185-35-35-9-3).
- Continue right, drop a Power Bomb. Run past the BRINSTAR/CRATERIA lift and through the Blue Door to the right, through this small room and another Blue Door heading right.
- There is an Energy Tank in the ceiling of this room near the hanging blocks. Shoot the ceiling to reveal it’s location and jump up to get ENERGY TANK #10 (185-35-35-10-3).
- Drop a Power Bomb to remove blocks to your right. Speed Boost to activate Speed Jump and leap up the shaft you have just cleared.
- Go through the Blue Door to your left.
- Use the X-Ray Scope to reveal a hidden platform across the spikes. Beware of falling boulders.
- Go through the Blue Door on the left of the room.
- There are two Missile packs in this room. Collect MISSILE #38 (190-35-35-10-3) from the pedestal and MISSILE #39 (195-35-35-10-3) which is hidden in a block on the floor to the left.
- Exit the room and work your way back down and left to the green room with the pipes. There is a K.A.R. along the way.
- Move through the top left Blue Door into the ‘PINK ROOM’.
- You need to go down to where you received the Charge Beam. Over the hump and bomb down.
- Lay a Power Bomb and roll to the left. Jump down and through the Pink Door at the bottom.
- Speed Boost through this room to arrive where ENERGY TANK #11 (190-35-35-11-3). is located.
- Back to ‘PINK ROOM’.
- There is a Yellow Door we were unable to access earlier. It can be found on the right side of this room. Go through it.
- Clear the enemies and then use the Grappling Beam (or Screw Attack) to land up on a single grappling block near the ceiling. Shoot the Blue Gate open and jump through.
- Jump down and go through a Blue Door to the right. Pick up ENERGY TANK #12 (190-35-35-12-3).
- Exit this room and the following (which is a K.A.R.) back into the ‘PINK ROOM’.
- Jump up and Grapple across the grappling blocks (or Screw Attack) along the ceiling. Pick up MISSILE #40 (200-35-35-12-3).
- Drop down the hole just to the side of the previous Missile pack. Use a Power Bomb to clear some blocks and move through a trick wall on the left.
- Use the X-Ray Scope to find a passageway in the floor towards the left side of the room. Super Missile the passage, drop down and collect POWER BOMB #8 (200-35-40-12-3).
- Shoot the left wall to lower the column, drop a bomb and roll through to escape the room through a Blue Door to the right. You are now in the ‘PINK ROOM’
- Take the Blue Door which is above the grappling blocks in this room.
- Speed Boosting through this long room leads to an ENERGY RECHARGE STATION. You will fall through a hole in the floor as there are Speed Boost blocks. you will need to Speed Boost and Speed Jump back up.
- Drop a Power Bomb to clear some blocks to your left and leave the room through the Blue Door.
- Use a Power Bomb to go through the floor (where you can see enemies crawling around).
- Fall all the way down this long room and through the Blue Door on the left.
- Kill the enemies in this small room and continue through the Blue Door on the left.
- WARNING: there is a missing floor trap in this room. Use your X-Ray Scope to see the missing blocks then proceed to jump over the trap to reach ENERGY TANK #13 (200-35-40-13-3).
- Go through the Green Door. Pick up SUPER MISSILE #8 (200-40-40-13-3).
- Exit this room and now fall down the missing floor trap.
- There is a SAVE ROOM through the door to the left.
- Continue through this room to the right and through a Blue Door leading right.
- Screw Attack all of the way to the top of the room landing on the ledge at the top.
- Transform into morph ball and Spring Ball across the gap into the passageway.
- Roll through to collect POWER BOMB #9 (200-40-45-13-3).
- Exit through the top left Blue Door.
- Head back up using a Power Bomb along the way until you reach the Pink Door on the right near the top. Head in.
- Speed Boost across the crumbling bridge and through the Pink Door to the right.
- Collect the RESERVE TANK #4 (200-40-45-13-4). From the Chozo Statue in this room. This is the final Reserve Tank!
- Morph ball under the Chozo Statue to locate MISSILE #41 (205-40-45-13-4).
- Morph Ball Bomb where you collected the previous Missile Pack to reveal some breakable blocks leading to MISSILE #42 (210-40-45-13-3).
- Exit this room.
- Shoot out the ceiling and jump up through the hole. Collect SUPER MISSILE #9 (210-45-45-13-4).
- Jump up onto where the Super Missile Pack was to fall through the floor.
- Jump back up onto the crumbling bridge but fall down this time to collect MISSILE #43 (215-45-45-13-4).
- Exit the room and head up to take the BRINSTAR/CRATERIA lift.
–CRATERIA–
- Go back to your ship.
- There is a Yellow Door near the top right part of this area. Use Screw Attack or Speed Boost Jump to reach it. Go through.
- Move through this room to collect POWER BOMB #10 (215-45-50-13-4). This is the final Power Bomb!
- Exit the room and run to the edge of the ledge and jump across the area. If you are lucky you will break through some blocks to the left side of the room. If not use Screw Attack to break through (about half way up the left wall of the area).
- Power Bomb or Screw Attack through any remaining blocks and head on through a left Blue Door.
- Screw Attack through this room and proceed through another Blue Door.
- Collect ENERGY TANK #14 (215-45-50-14-4) from the Chozo Statue. This is the final Energy Tank in the game!
- Bomb the ground in front of the Chozo Statue in order to Morph Ball roll through underneath.
- Continue left. Screw Attack through the next part including the moving spiky ‘wall’.
- Go through the Blue Door.
- WARNING: There are collapsible blocks in this room. The blocks will also reform quickly as you fall through them making it impossible to jump back up.
- There are two Missile Packs below you, one to your left and one to your right. You will need to shoot the blocks diagonally down as you fall in order to make a path to MISSILE #44 and (220-45-50-14-4) MISSILE #45 (225-45-50-14-4). getting both in one go is hard so you may need to loop around again.
- Power Bomb to escape down below. *—Note: there is an enemy around here who will drop Power Bombs if you need one.
- Go through the door to your right, run up the path and through another Blue Door.
- Bomb through the ‘wall’ and drop down the first hole. Take the Blue Door in the ground.
- Drop all of the way down this long room and move through the Blue Door on the bottom right.
- Use you X-Ray Scope to see a hidden passage in the floor just outside the door you exited. Bomb and drop down.
- Collect MISSILE #46. (230-45-50-14-4). This is the final Missile Pack in the game!
- Jump back up and exit the room the way you came.
- Jump up to the first ledge connected to the right wall. Bomb and roll through.
- Enter the Yellow Door.
- Freeze the jumping yellow enemies (‘Boyon’) to make a ‘bridge’ so that you can Speed Boost and Speed Jump up at the end of this room.

- Collect SUPER MISSILE #10 (230-50-50-14-4). This is the final Super Missile in the game! You should also now have 100% of all items in Super Metroid!! Huzzah!
- Roll through the left side of the room. Use either the Grappling Hook or Screw Attack to cross the spikes. Go through the door to the left.
- Morph Ball Bomb and roll through the gap. Jump back up through the door in the ceiling.
- Go back to the top of this hole. Bomb and move through the left Blue Door.
- Speed Boost through the next room and through the next Blue Door.
- Go down to the bottom of this room and take the Pink Door to the right.
- Run through this room and continue through a Blue Door.
- The door will seal grey and the statue will change colour showing each big boss you have defeated so far. The floor will open up revealing the CRATERIA/TOURIAN lift. Go down.
–TOURIAN– 
- Take advantage of the SAVE ROOM to the right if you wish.
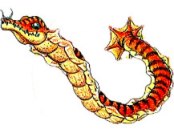
- Now take the door to the left to begin your trek through TOURIAN. You will need to kill all of the Metroids as you go to progress. There is only one path to take so you will not get lost.
- TIP: An effective way to kill Metroids is to first freeze them using your Ice Beam and finish them off using Missiles.
- After you have had your energy taken by the ‘Super Metroid’ you will reach a room with two doors. Shoot the Pink Door but DON’T go through. Take the door to the left first as it contains both an ENERGY RECHARGE STATION and a MISSILE RECHARGE STATION.
- Exit this room and continue through the now Blue Door to the right. You will need a super missile to open the Gadora Door.
- Between here and the final boss is one last SAVE ROOM. You will be able to see it on the map after you enter the Gadora Door.
- –FINAL BOSS FIGHT– MOTHER BRAIN. Continue though the bottom right Pink Door into the ‘MOTHER BRAIN ROOM’.

- Use Missiles to break the vulnerable electrical connections blocking your path.
- Use Missiles to shatter the glass exposing the MOTHER BRAIN.
- Continue spamming the MOTHER BRAIN with Missiles until MOTHER BRAIN ‘wakes up’.
- Continue fighting MOTHER BRAIN using Super Missiles, Missiles and Charge Beam until ‘Super Metroid’ Appears, and finish off MOTHER BRAIN with your new super powerful weapon you receive The fantastically deadly deadly Hyper-Beam.
–Escaping Zebus–
- Move to the left side of the room as MOTHER BRAIN
- As soon as the time counter begins run left and go through the door in the floor.
- Next take the bottom right door.
- Run along the floor in this room activating Speed Jump and leap up to reach a door on the top right of the room.
- Jump up the platforms to the top of the room.
- Move to the right, then to the left. Drop down a long fall.
- Right then up to the top left using the platforms.
- Through the door to the right.
- Jump up to the top of this (familiar) room and exit through the door in the ceiling.
- Continue up to the top of the hole and to the right.
–SAVE ANIMALS–
· Roll through the gap to fall down to go through the door at the bottom.
· Run through the next room and through the following door.
· Blast open the right side of the room to create an exit for the animals to escape!
· You are an amazing hero!
· Run back the way you came and go back up the hole on the right.
- Head right, through one last door to where you will reach your ship!
- Woo!! Super Metroid is completed!!!!!!
- Hopefully you should have a time nicely under 3 hours, to get yourself an eyeful of bathing suit Samus, you have the honour of 100% completion and get to see the speck shooting off of the rescued animals confident you are now a true Super Metroid Master!
- P.S: If you did not choose to save the animals you are a Failure and need to re-do it!
–a bonbri walkthrough–
